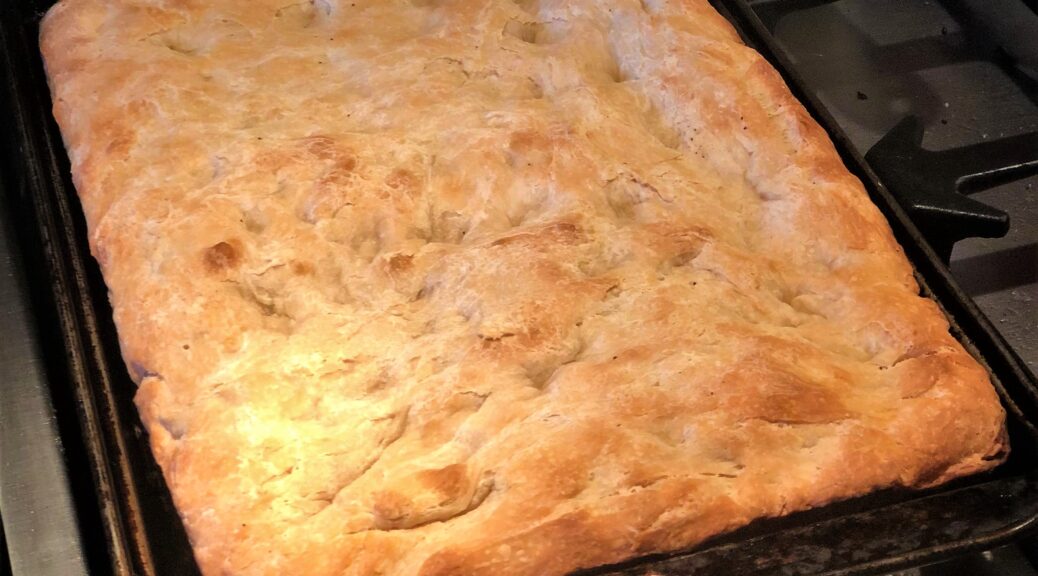
Pepper and Egg Sandwich
The Pepper and Egg Sandwich is a classic Italian lunch. You could find it in any luncheonette, coffee shop or deli in any Italian neighborhood.

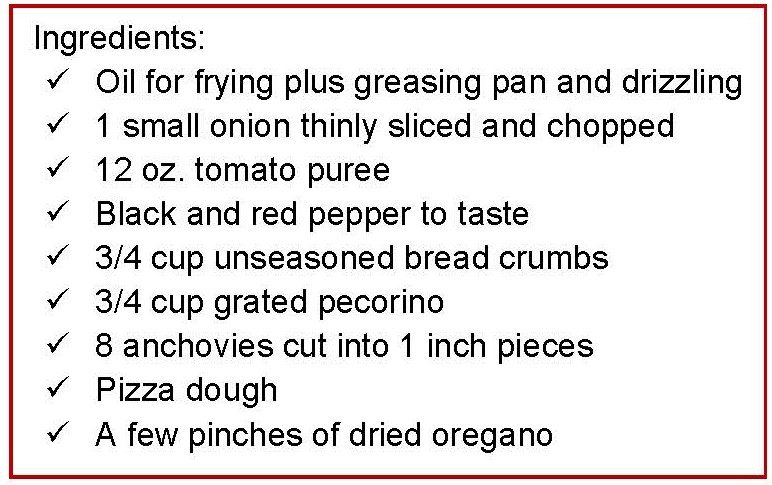
Ingredients:
- Salt and black pepper
- 1 green bell pepper, sliced
- 3 large eggs
- Italian bread
Begin by preheating the broiler with the upper rack as high as possible. In a heavy pan, heat the olive oil and add the sliced green bell pepper. Season with salt and black pepper, and sauté until the edges of the bell pepper begin to brown.

In a bowl, beat the eggs and pour them into the pan, stirring gently to coat the pepper slices with the egg mixture. The ratio of one bell pepper to three large eggs is just about the right blend of ingredients. Allow the eggs to set, but ensure the top remains slightly moist.
Finishing Touches Under the Broiler
For the finishing touch, place the pan under the broiler for 2 to 3 minutes, allowing the sandwich filling to cook to perfection.


Click here for updated GALLERY
Portfolio and Yelp